|
Faux limestone
for the foyer
by Stacey Enesey Klemenc
, it's inevitable that some of the products and techniques researched will find their way into your own house. Such was the case when it came time to paint my foyer.
A few years ago, I tucked into my "dream projects file" a magazine that had a picture of a stairway that looks a lot like my front staircase. Only instead of bland off-white walls, this beauty was surrounded by the soft faux look of limestone in mellow tones of gold and yellow. I wanted that look — in those colors — and I was willing to invest a little (make that a lot) to get it.
 I interviewed a couple of painters and immediately clicked with Ann Rock of Faux Fabulous in Virginia Beach. Stones, she said, were her specialty of late, and although she had never produced limestone she was certain that she could. A look at her portfolio and I, too, was convinced she was up for the job. I hired her. I interviewed a couple of painters and immediately clicked with Ann Rock of Faux Fabulous in Virginia Beach. Stones, she said, were her specialty of late, and although she had never produced limestone she was certain that she could. A look at her portfolio and I, too, was convinced she was up for the job. I hired her.
Rock's crew helped prep the stage by taping around the adjacent areas and base-coating the walls in the grout color, Sherwin-Williams' Navajo White (6126) in eggshell. Rock then began the tedious task of measuring from the ceiling line to the chair rail to determine the appropriate dimensions for the stones. Using the picture as her guide, she came up with 10 ½ inches-by-20 inches. For consistency's sake, she says, it was very important to have each stone as close to this measurement as possible.
 "Any adjustment to compensate if the ceiling line is out of plumb needs to be made in the top row of stones," where most people won't notice a subtle difference in size, Rock says. "It's very important to start at the top and work your way down for a project like this to turn out right. You don't want any lines running uphill. You want everything to look symmetrical and in balance." To do this, you need to have a means to make a level line both horizontally and vertically. "And you need to keep checking it all the way across," she adds. "Any adjustment to compensate if the ceiling line is out of plumb needs to be made in the top row of stones," where most people won't notice a subtle difference in size, Rock says. "It's very important to start at the top and work your way down for a project like this to turn out right. You don't want any lines running uphill. You want everything to look symmetrical and in balance." To do this, you need to have a means to make a level line both horizontally and vertically. "And you need to keep checking it all the way across," she adds.
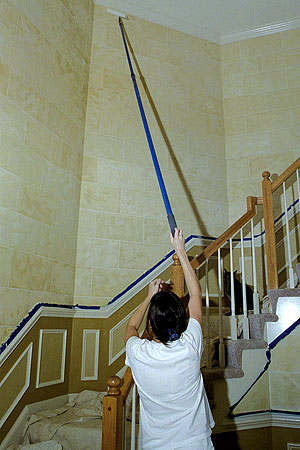
To make sure her lines were straight, Rock used a Ryobi leveling laser and half-inch wide tape she bought at an art store for the grout line. She cautions against using a pencil to make lines as the marks will never be fully covered.
Moving from left to right, Rock found things worked best when she taped off a 4-foot-by-6-foot section of the rough-textured plastered walls and then painted. "The tape was low-adhesive and if I taped much more than that it started falling off before I could get to it," she notes. "And forget leaving it on overnight. It was all droopy when I arrived in the morning and I had to redo it."
(A laser that adheres to the wall will cut your time in half, Rock adds. And, as she found out a little too late for this job, they do make one that will stick on textured walls.)
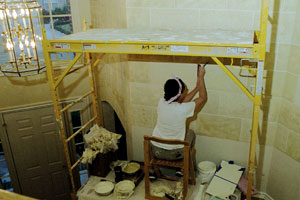
 The scaffold had to be repositioned three times so she could reach the top of the walls from the multilevel staircase. "There were four levels to this project, so the scaffold was all over the place," Rock says. "I felt like a lot of things I'd done in my life — like surfing in Hawaii as a teen and doing gymnastics as a kid — helped prepare me for this job." The scaffold had to be repositioned three times so she could reach the top of the walls from the multilevel staircase. "There were four levels to this project, so the scaffold was all over the place," Rock says. "I felt like a lot of things I'd done in my life — like surfing in Hawaii as a teen and doing gymnastics as a kid — helped prepare me for this job."
To color the stones, Rock made the glaze mixtures partially with paint used on the rest of the foyer and adjoining family room. She estimates she used 50 percent paint, 25 percent glaze and 25 percent water to make her concoctions. "The more glaze you use, the more translucent it gets," she says.
"I had four dishes of varying colors made up," Rock continues, adding that the base colors were all from the same color chip: Sherwin-Williams' Navajo White, Ivoire (6127), Blonde (6128) and Restrained Gold (6129). When deciding which went where, "I randomly selected the colors except for the design around the archway, which I purposely wanted to be lighter."
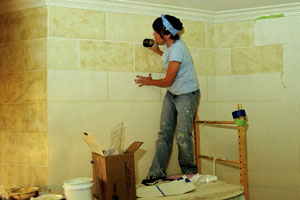
Each stone consists of just two colors, which she applied with a 3-inch roller. "I dipped one end in one color and the other end in a darker color and blended them lightly on the wall for variation. You need to be careful that you don't overblend or you'll wind up with a solid color." And you also need to use just the right amount, she cautions.
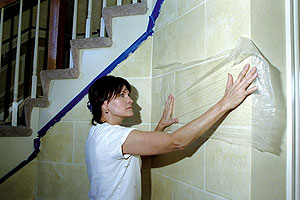
While the paint was still wet, Rock scrunched up some painter's plastic and smoothed it over each stone. Then she yanked it off to make patterns in the paint and to produce a mottled look. "You also may want to rag here and there for added effect," she says.
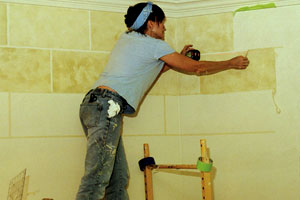
Next she used a 1-inch wide, inexpensive hard-bristle brush with ends that she haphazardly clipped to fill in any empty spaces along the ceiling line and in the corners. "You want the bristles to be uneven so you don't have a hard, crisp paintbrush line," she explains, adding that this step alone is a very important detail in achieving professional results.
 Finally, after the paint dried, she added a shadow line on one side (depending on the light source) and at the bottom of each stone to give her design some depth. To accomplish this step, she used a straightedge and a quarter-inch artist angle brush. Finally, after the paint dried, she added a shadow line on one side (depending on the light source) and at the bottom of each stone to give her design some depth. To accomplish this step, she used a straightedge and a quarter-inch artist angle brush.
And even though the customer (that's me) insisted on using Sherwin-Williams' top-of-the-line Duration Home (which did go on like butter, Rock says, and was a pure pleasure to work with), we opted to coat Rock's faux masterpiece with Behr's Premium Plus water-based polyurethane clear matte for added protection.
I plan on enjoying the fruits of Rock's labors for many, many years to come. Now ... on to the next project!

|