|
...continued from previous page
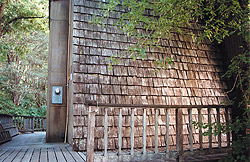
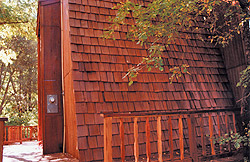
Exterior Wood Stain:
Staining Shingles & Shakes
Modern exterior stains can preserve the beauty of cedar, redwood, and cypress for many years.
by Gail Elber
and the gray layer of wood have been removed, Robles “grooms” the surface with sanding sponges and brushes to remove any fibers loosened by pressure washing.
Two days after pressure washing, the finish itself can be applied. Robles experiments with various stains, including Armstrong-Clark and TWP products. For new work or houses with a lot of trim, he uses brushes and rollers with 11⁄4 inch pile covers. For refinishing, he uses an airless sprayer. Either way, he applies two coats of finish within an hour of each other, so that the first coat is still wet. Not all stains like to be applied wet on wet, so consult the manufacturer.
Robles may also add an additional coat to the south side of the house, which is more prone to sun damage. If a house is by the sea, the ocean side needs an extra coat because sun reflecting off the water and sand gives it a double dose of UV radiation.
Wood is ready to refinish when you sprinkle water on the surface and it sinks in. You don’t need to know what was previously applied to the wood: you just need to get it all off. Any material that remains on the surface will either peel off or block the absorption of new stain.
First, you must remove any discoloration that may be present. Black stains may come from mildew or from metal touching the siding. Mildew is best removed with chlorine bleach, and metal stains can be removed with oxalic acid bleaches. Instead of brewing your own, use commercial bleaches made for prepping wood; they contain detergents to help them wet the surface and remove dirt, and they come with an MSDS, which, as Peter Hope points out, is handy if the neighbor’s dog comes over and drinks the bleach. Use a garden-type pump sprayer for bleaches, as they will attack a paint sprayer, and work from bottom to top of the wall, so that dirty liquid drips onto a wet surface and runs off.
If the siding is heavily stained, you must address the underlying problem that caused the stains before you apply a new finish. Shrubs by the house or clogged gutters may be causing mildew, and corroding hardware on a house can cause metal stains. Brown stains come from water-soluble pigments in the heartwood of cedar, redwood, and cypress. These stains yield to oxalic acid and will generally fade in the sun and rain, but persistent migration of this material is a sign that water vapor is moving out through the siding and will ultimately condense and cause deterioration.
Next, to remove peeling material and patches of waterproofing from the surface so that your new stain can penetrate, pressure-wash the wood at 2500-3000 psi. Then smooth the surface with a sanding sponge or bristle brush as described above. When the surface has dried to 15 percent moisture, or whatever the stain manufacturer recommends, you can apply your stain with a sprayer, brushes, or rollers.
Homeowners who crave the silvery look of weathered cedar are in for a disappointment; in humid climates, shakes and shingles will turn black with mildew rather than silvery, and in arid climates, silveriness is a precursor to cracking and splitting. Most stain manufacturers make a stain containing gray pigments that will give the siding an instant gray look while protecting it from UV damage. Another possibility is Cabot’s Bleaching Oil, which is formulated to encourage the siding to go gray within six months. It can be mixed 50:50 with Cabot’s Weathering Stain, which contains gray pigments that will impart immediate gray color and UV protection to the wood. Remind the client that whether the gray layer is made of deteriorated lignin or pigment, you’ll be removing it every few years when the siding is restained.
You can mix stains from the same manufacturer to achieve a desired color. “Since everyone’s wood is a different color to begin with, I have the client drive around to take a look at homes I’ve done with shingles close to theirs in age and color,” says Robles. “I keep all my blends in the computer. If the client likes a certain house, but it’s just a little too yellow, I look at the blend and will maybe tone down the yellow from say 60 percent to 40 percent and replace that 20 percent with Rustic Brown or Sierra Redwood.”
Robles likes to arrange a maintenance plan with his clients under which he comes back in a year and brushes on another coat of stain without power washing. “It adds two years to the life of the finish,” he says. In any event, keep an eye on houses you’ve stained so that you can redo them before unwanted graying sets in.

|