Paint Brushes, Paint Rollers for Decorative Techniques
Tools and tricks from the experts.
by Denise Wendt to achieve a variety of effects for hundreds of years. More recently, rollers have been used, often in concert with brushes, to create beautiful and unique faux finishes.
Mike Krawiec knows exactly what a simple brush and roller can do. He spent 13 years in the field doing decorative painting for Chicago-based Ascher Brothers. Now he teaches decorative painting techniques to union painters through the Chicago Area Painters and Decorators Joint Apprenticeship and Training Committee (JATC) program.
“We have panels on the walls [at the JATC] done by apprentices,” says Krawiec. “Most of them have won national awards, and all of these techniques have been done with brushes and rollers.”
As any decorative painter knows, the tools of the trade do not come cheap. Here are a few tips for getting the effects you want without spending a fortune.
Krawiec and his students put old brushes to the test and save money on tools in the process. He keeps old exterior brushes around for marbling and wood graining. The bristles are thin enough to create the fine lines found in wood grain. He uses brushes to create a striated effect, laying the brush flat against the wall and dragging to divide the paint or glaze into fine lines. By dragging the brush in another direction, he creates the look of woven fabric.
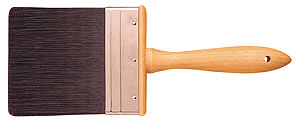
 Krawiec creates an inexpensive stipple brush by sawing the handles off two 4-inch exterior paint brushes, drilling through the metal part and bolting the brushes together with two bolts. “A good stipple brush runs about $380,” says Krawiec. “You can bolt together a couple staining brushes for under $15 a piece and get the same effect.” Krawiec creates an inexpensive stipple brush by sawing the handles off two 4-inch exterior paint brushes, drilling through the metal part and bolting the brushes together with two bolts. “A good stipple brush runs about $380,” says Krawiec. “You can bolt together a couple staining brushes for under $15 a piece and get the same effect.” By using a piece of rope to tightly bind the bristles near the center of a 3-inch, long-hair, exterior brush, Krawiec creates another inexpensive stippling brush. “We’ve used those to do large relief stencils,” he says.
 |
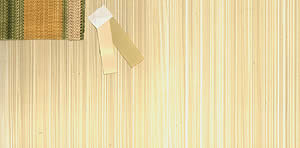
| Strie finish created by Buon Fresco. |
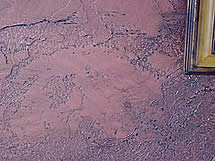
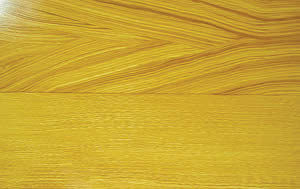 Wood graining created by Barth's Faux Finishing. Wood graining created by Barth's Faux Finishing. |
Johnny Alderman teaches decorative painting techniques at the Indianapolis Painters Joint Apprenticeship and Training Committee, where he is also the training director. He echoes Krawiec’s thoughts on being frugal: “I don’t believe you have to spend a lot of money on gadgets to get the effects you want,” says Alderman. “We use what’s at hand and try to get the most out of those tools.”
Alderman uses very simple tools “because they’re cheap and they’re available and anybody can use them.” He often uses a combination of natural sponges and rags to teach a variety of faux finishes in his classes.
Krawiec, Alderman’s Chicago counterpart, uses what he calls “chip” brushes, usually found in the kitchen and used for basting meat. “Those work exceptionally well for wood graining,” says Krawiec. “You don’t need a quality bristle, because you’re not using it as an applicator. You’re using it to manipulate the surface.” He drags the brush on its edge to create a banded effect. “And because the bristles are thicker, they wear a little bit better than the regular paint brushes that aren’t designed to be used on the edge,” he adds.
Krawiec uses old 3⁄8-inch oil brushes to create knots in paneling. “When the bristles start to get a little hard they make really good knots for wood graining,” says Krawiec. After dipping the stiff bristles into a mixture of flat beer, whiting and colorant, he places the tips of the bristles on the wall and twists to create a knot.
exterior paint brushes as floggers, slapping the surface of the wall with the side of the bristles to break up the glaze into bands. For finer lines, he goes over the surface again with a fine-haired house brush.
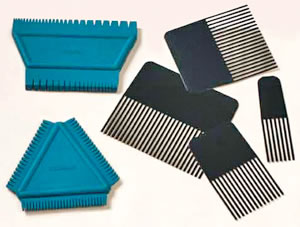
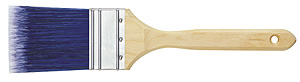
Buon Fresco — Wall Artistry’s director, Victoria Bingham, says that one of their studio favorites is a brushed finish referred to most often by its French name “Strie,” which translates loosely as “stripes.” In fact, Bingham explains, the finish looks not like stripes per se, but like a fine weave of fabric on the wall. The finish is created by rolling a matte-sheen glaze color over a lighter semi- or high-gloss base coat and then pulling a strie brush through the glaze to separate the color into very fine strands. Bingham defines a “strie brush” as any number of straight-edged, flat, firm-bristle brushes of varying widths, adding that she especially favors wallpaper and dusting brushes.
Alderman uses brushes, feathers and natural sponges to create marbled effects. When creating a faux black onyx marble, he begins by laying down a base coat of black with a small-nap roller. He uses sea sponges to apply three or four different shades of gray, applying a coat of clear between each coat to create depth and softening each color with a badger blender.
“When you do sponging the important thing is to rotate the sponge,” says Alderman. “If you don’t rotate it you get a repetitive pattern. Real marble doesn’t have a repetitive pattern. That’s a tell-tale sign of a bad faux job.”
He creates veins with a turkey feather, carefully spreading and pressing the fibers of the feather across the surface to create the fine lines found in marble. “You have to be careful when you do veining,” says Alderman. “Veins can overpower things pretty quickly, so you have to use them sparingly.”
“I find that the better you get, the fewer brushes you need,” says MacNeil. The 25-year veteran prefers a 3-inch badger blender for marbling and wood graining. “It softens the glazes and gives you all the depth you need,” says the Ventura, Calif., painter.
A favorite tool of the decorative painter is without a doubt the badger blender. It worked for the masters 200 years ago and it continues to work today. But there are many other tools available for achieving the marvelous effects seen in today’s faux finishes.
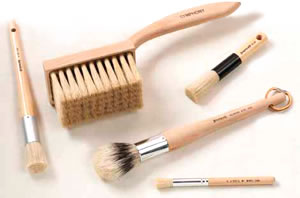
Bruce Schneider is a sales technical support manager for Purdy Corp., a Portland, Ore.,-based manufacturer and distributor of painting tools. “Faux finishers will use regular paintbrushes and roller sleeves to apply paints and glazes, and in some instances they’ll use regular painting tools to get an effect,” says Schneider. “But to a large degree, they use tools specialized for their craft.” Examples of these tools include badger softeners and blenders, veining tools, draggers, floggers, sponges, graining tools, check rollers, stipplers, pounce brushes and mottlers.
But even Schneider agrees that the newer techniques more often reflect changes in finishes and materials than in applicators.
“With the advent of waterborne and water-based glazing liquids, many of the new applicators are made out of synthetic filaments,” says Schneider. “Many of the Purdy products can be used for these kinds of applications. Our newest family of brushes, Syntox, can be used as faux finishing tools and work well as a blender or softener. They are soft enough to work well in both oil- and water-based glazes and still have enough backbone to be used as a pouncer.”
Barth White owns and operates Barth’s Faux Finishing in Las Vegas, a 7,000-square-foot facility that includes 2,500 square feet of training space. White says that most of what knows about brushes he’s learned from experimenting. “I go to the store, I grab a brush, ask what it’s used for and try it out,” he says.
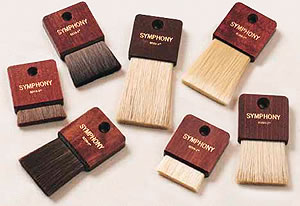
“There’s such an assortment,” adds White. “We use special brushes for wood graining. There are brushes we use to soften our glazes for marbling. There are brushes we use for gilding because they’re so soft they won’t leave any marks.” The brush most often used by White’s crew? A cheap bristle brush for wood graining to create fiber.
“A lot of us have brushes that we use for everything,” adds White. “For marbling, one of my favorite brushes is the small fitch brush.”
“The beauty of faux finishing is that it is an artistic endeavor, and there is really no wrong way to do it,” says Schneider. “There are certainly learned styles and techniques that make the process go smoothly, but depending on the effects you are after and the mood of the person applying the finish, it is an expression of that individual.”
The important thing is not the tool, but the materials you use, Alderman says. “You can create marvelous finishes by using just brushes, rags and sponges. You can even grain doors with a piece of cardboard.
It is important to use colors that are pleasing to the eye, as well as patterns that effectively replicate real stone or wood surfaces. What’s important to understand is that there are an endless variety of faux finishes, and that you need to constantly experiment with combinations of materials and tools to achieve the faux finish that you desire.”

|
 Creating walls that sparkle